In this section we provide a method of textile fiber preparation for dyeing using wool. Wool is a good material to start with if you’ve not dyed fabrics before. Once you’ve completed the dyeing & drying processes correctly, you can spin and knit your wool to suit your next project.
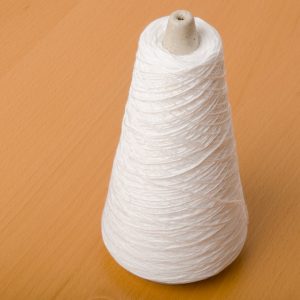
It’s a good idea to practice first using a small 100g amount of wool fiber from a yarn.
Ensure that the wool is scoured before the dying process.
Remember that as simple as it might sound, dying your own fabrics is not without risks, so please ensure that you’re well prepared to avoid any accidents.
Before handing dyes and starting the dyeing process, make sure you’ve got plenty of space to place your equipment. You may wish to use a couple of plastic containers, buckets or washing up bowls depending on the volume of fabric you wish to dye, so think ahead before hand and clear enough room for your equipment.
- Use good quality protective gloves, particularly when handing warm fluids and when dipping your fabrics into the dye pot. Don’t re-use any containers for food purposes once you’ve used it for fabric dyeing.
- Whilst our natural dye is not an irritant, you may wish to use a face mask so that you don’t breathe in any fine particulate when measuring out the leaf powder.
- Take additional care when handling any mordant chemicals such as alum, ensure that you’ve read any advice instructions on your supplier’s packets.
- Don’t eat, vape, smoke or do anything when dyeing or mordanting that involves handling objects that you may bring to your lips.
- It’s best to work in a workspace with good ventilation, without young children or pets around.
- Wear old clothes, aprons and other clothing you don’t mind getting stained or wet. If you like your workspace or work table as it is, it’s probably a good idea to cover it with a suitable protective sheet before starting to work.
- Scouring the wool
Not cleaning wool properly is one of the main reasons for not obtaining the best results from the natural dyeing process. Wool needs to be well scoured before it is dipped in the dye mixture even if it has just been purchased from the manufacturer. Scouring provides a thorough cleansing of the fibers, preparing it to receive the color more efficiently; this process removes grease and oils and dirt from the fiber. To scour wool, top up a bowl with warm water (around 50 and 60 C so get a thermometer handy before you start). The add soap or a detergent such as washing up liquid and leave the wool to soak for at least two hours, alternatively leave it soaking overnight. Take extra care when rinsing the wool, since agitating the wool or changes in temperature can cause the wool to bind together (matting) and to felt.
After you’ve rinsed the wool, you can drain it using a large colander and salad spinner.
Put the wool on a towel and let it dry.
Before mordanting the wool, carefully pull apart the fibers to increase the available surface area, assisting the dye penetration.
For best results, once you’ve completed your cleaning and dyeing of your wool and fibers, avoid storage in plastic bags.
- Mordanting the wool
Use the following guide for ratios;
- 100g scoured wool (dry weight)
- 8 g of alum.
- 7 g cream of tartar (Potassium Bitartrate)
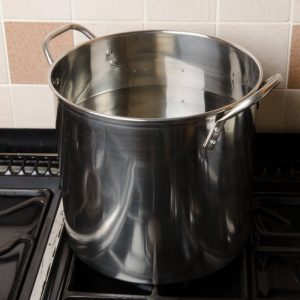
- 10 litre stainless steel stock pot or saucepan.
When you are mordanting fiber, it is best to use no more than 10g of wool per litre of water. A good start point is to use 100g of wool in a ten litre pot.
Whilst there are some differences between individuals, we have seen the best results with 8% of alum and 7% of cream of tartar in respect to the dry of weight of the wool. If too much Alum is used this can result in a sticky feel to the wool fibers.
Cream of Tartar is referred to as an ‘Assistant’ that increases the amount of alum absorbed by the wool, so its use can modify the final resulting color.
Tip – When sourcing your cream of tartar, don’t forget to ensure that you are using ‘Potassium Bitartrate’ rather than the cooking substitute ‘Sodium Pyrophosphate’.
- Weigh the wool and leave it to soak in water for at least an hour or even overnight.
- Fill a saucepan ¾ full of cold water.
- Pour boiling water into a small heatproof container and add the cream of tartar, stirring it well until it has dissolved then add it to the saucepan.
- Pour boiling water in a small heatproof container and add the alum, stirring it well until the alum has dissolved. Add the dissolved alum to the saucepan.
- Add the pre-soaked scoured wool to the saucepan.
- Raise the temperature of the saucepan slowly to a simmer (around 87 C to 93 C) for most wools. Fine wools may need a lower temperature. Simmer gently for an hour. Make sure that all the fibers are submerged, and give it a gentle stir occasionally.
- Leave the wool to cool in the saucepan, this can be done overnight.
- Drain the wool. For best results, place the wool in a large colander to drain and then take small amounts at a time for additional drying in a salad spinner.
- Put the wool on a towel and let it dry.
- When you are ready to dye, rinse the wool well to remove any unfixed alum.
- Dyeing the wool
As wool is more delicate that prepared garment fibers, you’ll need to make sure that you don’t put the fibers through any quick adverse temperature changes to avoid any matting together.
- As a general guide, use at least 100-250g of dye powder for each 100g – 250g amount of wool that you wish to dye.
- Add at least 2-3 litres of water (or enough to submerge a t-shirt in a washing up bowl or bucket).
- Take the 100-250g of dye powder and add this to 2-3 liters of hot, simmering water which is at least 90 C. Keep raising the temperature until just about boiling and then simmer the mixture whilst stirring for at least 30 mins. This will allow the dye to leach into the water.
- Turn off the heat and allow the water to cool down to around 35C max.
- Once it’s cooled down at this stage, you should be able to decant the resultant fluid from the pot into another clean container for example a bucket or washing up bowl, leaving the used dye powder at the bottom of the pan. This is particularly useful if you’re using a leaf based or rough plant based dye material. Don’t worry if some material has gone onto the wool as this can be rinsed off later.
- At this stage, at the wool to the container with the dye fluid.
- Manipulate the garment inside the dye mixture every 10 mins for at least 1 hour, squish the wool gently together to ensure that the fibers are getting washed over with dye.
- For best results, leave the wool inside the mixture for at least 5 hours. You don’t need to re-heat the mixture during this soaking phase.
- The next stage is to drain and rinse your wool gently under cold (not ice cold) running water for a few minutes.
- Once rinsed, place your dyed wool on a towel.
- Once dried, you can spin or kit your wool. Alternatively store in a cardboard box (not plastic bag) for later use.